Though digital cameras become better and are equipped with higher resolution sensors every other day, from time to time we reach the point where our digital image file is just not big enough for our purpose. We urgently need this file printed in, let’s say 70x100cm, but the original resolution would then be less than we’d want it to be. As I came across this challenge some weeks ago, I decided to look for alternatives to the well-known yet suboptimal bicubic-resize-option we find in Photoshop. I only found 2 applications available for Apple’s Mac OSX that looked suitable to me. One is called „Genuine Fractals“ from OnOne Software, the other „Photozoom“ by BenVista. Both are compatible with MS Windows as well. Whereas Photozoom is a stand-alone application, Genuine Fractals works as a plug-in, so you need to have Photoshop installed.
For those who always read the last page first: It’s really hard to tell the difference between the two, but both produce better results than Photoshop does!

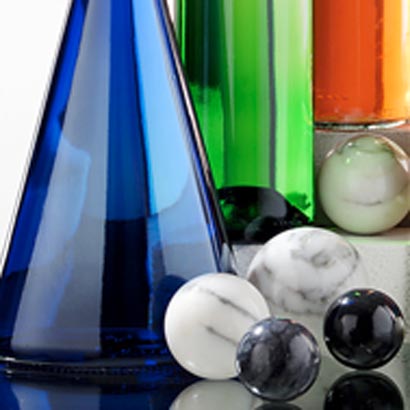
I have to admit that I only tested the standard bicubic setting within Photoshop, although in CS2 Adobe added methods called „bicubic sharper“ etc. Probably these would have had other results than I got (but I also used the default settings for the other applications). The image above was my first testing candidate. I cropped the file to the size shown in this article, it’s about 10cm width/height with a resolution of 96dpi. Afterwards I downsized the file to about a quarter of the original, so the result was 5x5cm/96dpi.
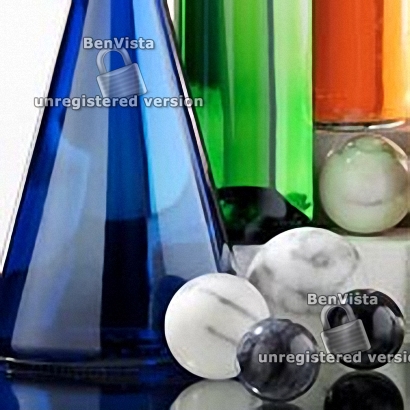
Then I resized this small file to the dimensions of the original using the 3 alternatives I had figured out. While the Photoshop result falls back in quality of details, edges, artefacts and sharpness, I find it hard to judge between the two other rivals. Have a look at the results first:
This one was blown up using Photoshop’s bicubic-resizing:
This one was resized with the „Genuine Fractals“ plug-in:

…and this is the result using „Photozoom“:
My first impression was that Genuine Fractals‘ result looks a bit artificial. It reminds me of converting an image into a vector graphics (things you can do with Adobe Illustrator). If you are lucky it can turn out great, but it depends on the image. If you have large, homogeneous areas in your picture, you’ll get less artefacts thus cleaner resized images. But if there are subtle shades of color in the photo, it can look messy afterwards because you’ll get small, same-colored areas within that gradient. It then seems like the picture has been converted into the low color-depth „indexed colors“ mode.
The same is true for sharpness. Photoszoom can produce a very good sharpness but eventually it might look a bit confused from artefacts.
The only appreciable difference I realized was the way diagonal lines or edges were resized. Here I found Photozoom way ahead of its rival. The resized diagonals looked very clean and sharp. Genuine Fractals‘ resized diagonals were poorly feathered.
This is a screenshot of „Genuine Fractals“:

This one shows the „Photozoom“ interface:

As a conclusion I can say that both applications are a great help for improving image size. Both produce better results than what you can get out of the Photoshop’s box. You have a giant pack of settings and preferences within the two for playing around. Personally I would prefer Photozoom for it’s consistency and more subtle details. It can also be used for batch processing. Genuine Fractals is more for the striking, screaming blow-up-job 😉

Antworten zu „Blow-up: Image resizing software test“
I personally prefer Photozoom.
[…] gerechnet werden. Das geht immer einfacher, als zu kleine Bilder zu vergrößern (siehe auch Blow-up: Image resizing software test). Ich bin nicht vertraut mit sämtlichen verfügbaren Bildbearbeitungs-programmen (schon gar nicht […]